Pages

Wednesday, 29 December 2010

Photoshop advice:How To Remove Backgrounds


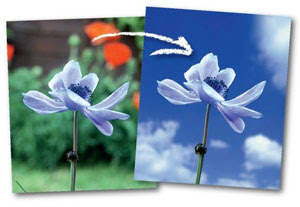
If you have ever done any image editing in Photoshop, you know that one of the hardest things to do is to take an image out of its current background. I have a very easy way to do this, which is also very accurate in getting just the image that you would like to use. Here are the steps to use to remove the background from an image in Photoshop.

The first thing that you need to do is to open the image whose background you would like to remove. Then select the Magic Wand Tool from the Tools box. The Magic Wand Tool is a great tool to get the image you are trying to select roughed out. This tool will select a section of an image based on the color of the image. Do not worry about getting everything exactly right using this tool, but you want get a rough selection of the image you are trying to extract from the background. You want to click on the image to make the first selection, and then hold down the shift key while clicking to continue adding selections, until you have the entire image that you would like to remove selected. Right now you will probably notice that not the entire image has been selected, or that the selection is not very clean looking. To fix this, Photoshop has a very handy built-in tool to help clean up your selection.

Right below the color selection area in the Tools box is two small icons that look like cameras. The one on the right is Edit in Quick Mask Mode, click on this one and everything you have not selected will turn red. Then you can use the eraser tool to add to your selection, and the paint brush tool to remove from your selection. After using these tools to clean up your selection, click on the Edit in Standard Mode button to see your finished selection. Then you can click on Edit, Copy and then click on File, New to open a new image. Photoshop will look at the image that you have copied on the clipboard, and size the new image to the same size as the image copied. Then paste your copied image to the new image, and you will have your extracted image with a transparent background.

Photoshop advice:learn how to Make a Photo Break out of a Frame


This is actually a fairly simple task -- although many of the Photoshop authors make it seem more difficult than it really is. Using logic, the portion of the image to be popped out of the frame must be separated from the original image and raised to a higher level, in front of the frame, while leaving the original photo in tact. This technique works in any image software which has layers.

1. Cut out the image: Using any of the software's selection tools you wish, make an accurate selection of the portion of the image you wish to pop.
In this example we used a combination of the Lasso and Magnetic Lasso to carve out the front of the car. Tip: to save time, cut only the part that will pop out.

Lift the image: Once your selection is accurate, and ready to go, duplicate it onto its own layer by using the "float" command (Cmd/J or Ctrl/J)

You can see the nose of the Jaguar is now on its own layer. (#1 in the layers palette) Note that it's just the nose -- no use to select more than you have to. It will match perfectly with the original image on the background layer and provide a seamless pop-out.

2. Create the Frame: Now, in a new layer, you can create the frame for the photo. Here we simply used a white background with the frame cut out. Layer #2 in the diagram.

At this point you can decorate or modify the frame any way you wish -- textures, borders, etc.
Key Concept: Layer Sequencing. Always remember that the stacking order of your layers affects the final product. As you look at the file, you'll understand that the layers were generated in that specific stack order to achieve the effect -- even though they may not have been created in that order.

Also note that we did all the selection work on a COPY of the background, just in case we flubbed something up, or needed to go back and get more of the image. The "work" layer can be deleted, and the whole image flattened when complete. MORE ON PHOTOSHOP